KasaClient
Post-Installation Configuration
Resizing Communication Windows
About KasaClient
This App enables you to communicate in real-time with friends and colleagues in a peer-to-peer or group environment using broadband network.
An integrated solution, it consists of client software that resides at the endpoint and server software that manages all clients.
Users may communicate via Text, Audio or Video.
You call friends (or receive calls) for one-to-one communication from anywhere in the world. During the conversation you may allow other friends who call to join the conversation, or you may call other friends to ask them to join the conversation.
Set up a Meeting or create Hangout sessions and ask friends and colleagues to join in. Better yet, look in KasaBook for an interesting group and join in.
What’s New
This version of KasaClient includes the following features:
- Text, Audio and Video communication.
- Peer-to-peer and group communication.
- Call Waiting and Merge.
- Call Hold and Merge.
- Do-Not-Disturb mode.
- Conversation recording.
- Document exchange.
System Requirements
KasaClient may be installed on computers running the following platforms:
Microsoft Windows
Operating System
- Windows Vista (32-bit) with Service Pack 1 or later.
- Windows 7 (64-bit) with Service Pack 1 or later.
- Windows Server™ 2003(32-bit, Standard, Enterprise, Datacenter, Web Editions) with service Pack 2 or later.
Hardware
- Processor 1000MHz Intel or compatible.
- RAM: 512MB minimum, 1GB recommended.
- Available disk space: 350MB minimum.
- Monitor that supports 800 x 600 resolution at 256 colors.
- Headset with Microphone and Speakers.
- Video Camera with YUV420 capable format.
Others
- Internet browser.
- Internet service.
- Configure Firewall to allow use of port numbers used by Kasanoma LLC.
Installation
To install KasaClient you need the following:
- Internet browser.
- Administrative privileges on your computer.
Install as follows:
- Log on to your computer using administrative account.
- Open an Internet Explorer window and connect to http://www.Kasanoma.net.
- Go to the Download page and download latest KasaClient installation file to a temporary folder.
- Double-click on the installation file and follow on-screen instructions.
Post-Installation Configuration
You may need to perform the following configurations before you can properly use KasaClient:
- Select the Microphone you will use for Audio or Audio/Video communication.
- Select the Speaker to be used to generate a Ring tone when someone calls you.
- Select the Speaker to be used to output received audio.
- If you are in a noisy environment you will need to configure an appropriate noise control level.
- Configure your Firewall (when prompted) to grant access to TCP and UDP ports used by KasaClient.
You can open the client console from the Start menu or from the icon on the Desktop:
- To open the App from the Start menu, select “Programs > Kasanoma LLC > KasaClient”.
- To open the App from the Desktop, double-click the KasaClient icon.
When the App opens, the Kasanoma Membership window should pop-up if you are not already a member or you installed the client software on the computer for the 1st time. If you would like your friends to be able to reach you via Kasanoma.com you have to complete the membership form. Without a membership you’ll still be able to join groups in conversations.
The KasaClient Settings window opens if you have not entered information necessary for optimum client performance. Select the appropriate Microphone, Speakers and Ring Tone.
Click ![]() or choose menu option “Options > Settings”
to activate Settings window.
or choose menu option “Options > Settings”
to activate Settings window.
Settings Window
When the App attempts conversation with the remote server, your firewall software might prompt you for authorization. KasaClient uses a number of TCP/UDP ports which you will need to authorize before any conversation can take place. You might also contact us at support@Kasanoma.com.
Known Issues
Noise
The App cannot completely remove background noise during conversations. If you are in a very noisy environment it can result in inaudible conversation.
There is a real-time noise control slider available from the audio & video windows. Right-click in your picture (or video) window and choose “Noise” menu option and activate Noise Reduction. When you confirm your choices, stop talking for a few seconds for a noise profile to be created.
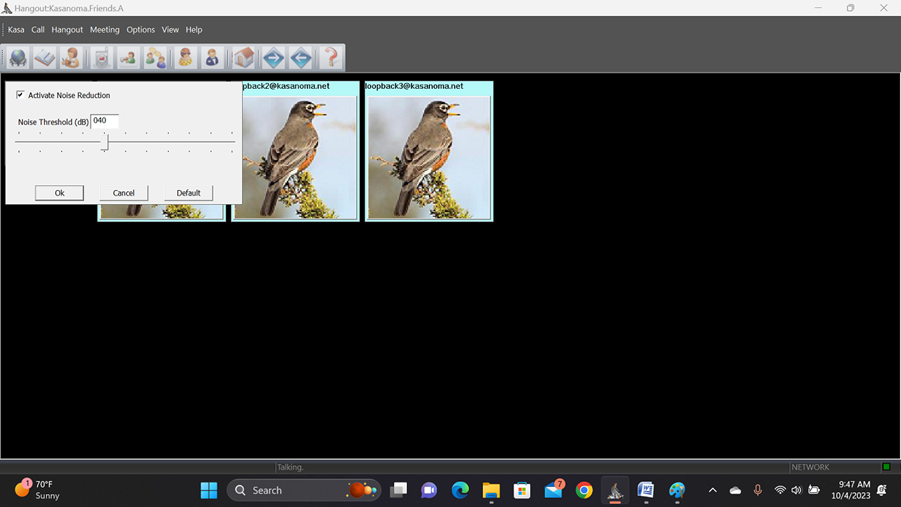
Noise Window
Echo
Using a microphone/speaker built into a computer may result in echo of received audio. Consider using a headset (with microphone and speaker).
There is a real-time echo control slider available from the audio & video window. Right-click you picture (or video) window and choose “Echo” menu option to display Echo window.
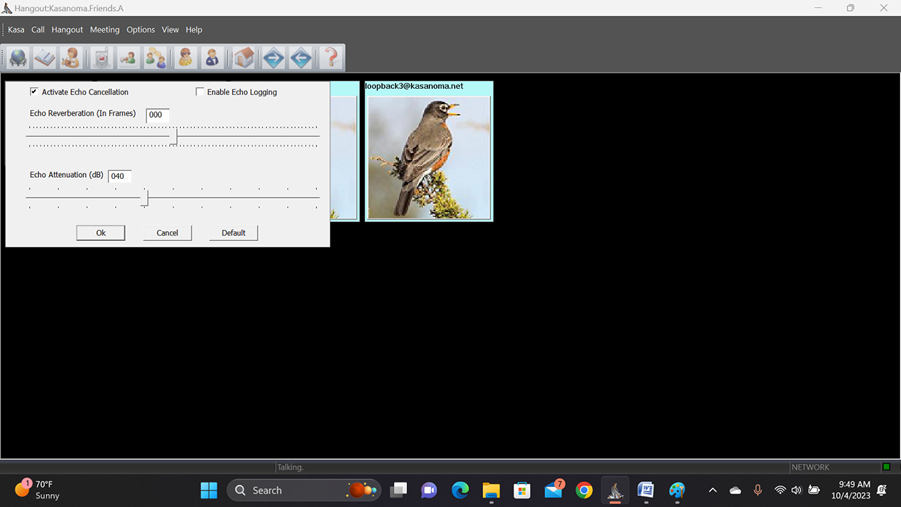
Echo Window
Contact Information
You can contact Kasanoma LLC via email or visit us at https://www.Kasanoma.com.
Our email addresses are as follows:
Technical Support - support@Kasanoma.com
Public Relations - info@Kasanoma.com
About Kasanoma LLC
Kasanoma LLC provides tools to enhance communication among its members thru ingenious use of personal computers and laptops. KasaClient is the 1st of the client software used to provide the growing services.
App Configuration
Click ![]() or choose menu option “Options > Settings”
to activate Settings window.
or choose menu option “Options > Settings”
to activate Settings window.
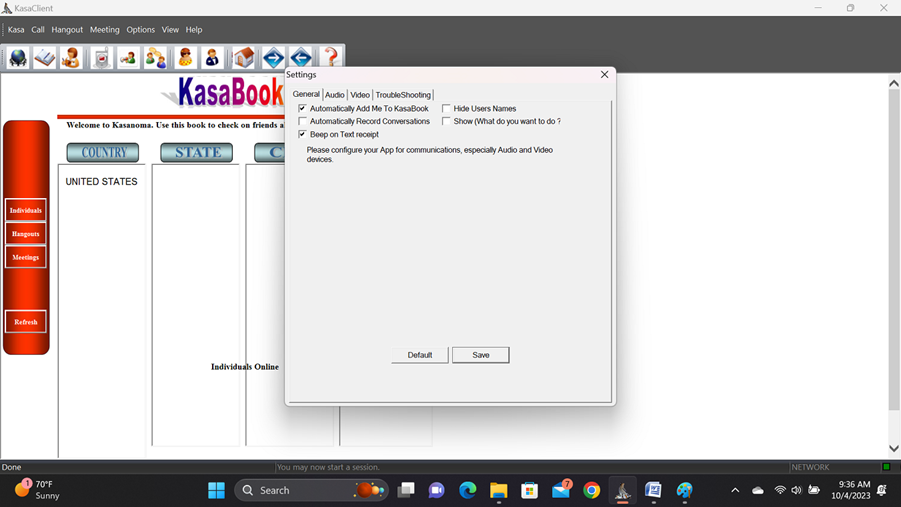
There are 3 tabbed windows for configuring the client. Click on the name of the tab to navigate the windows.
General Tab
Use this window to decide how you initiate communication using this App.
General Tab Window
Audio Tab
KasaClient searches for all supported audio communication devices on your computer, and pick one for default use. Use this window to customize the audio communication.
When you make configuration changes test them before you save them.
That red little circle turns green when the application starts using the microphone (recording).
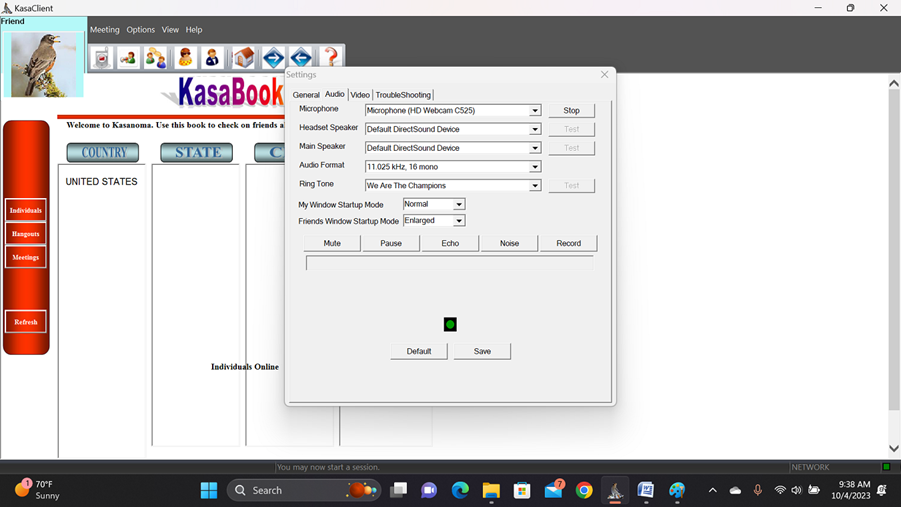
Audio Tab Window
From this window you can also record messages to send to your friends.
Video Tab
KasaClient searches for all supported video communication devices on your computer, and pick one for default use. Use this window to customize the video communication.
When you make configuration changes test them before you save them.
When you are testing a camera, you will see the live image in the tab window and another window will pop up to show you the version that will be communicated to your friends.
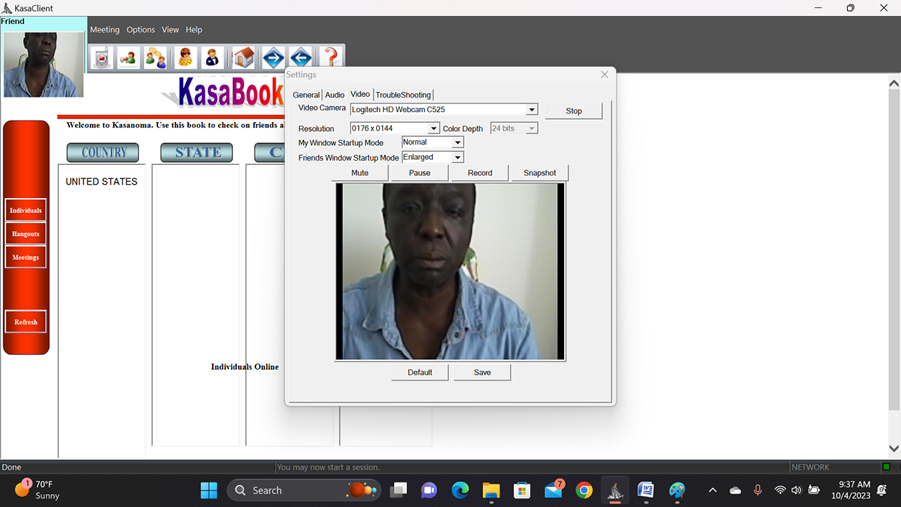
Video Tab Window
Yes, you may record a video message from here to send to your friends.
Becoming a Member
You don’t have to become a member of Kasanoma to join Hangout sessions, but you have to be a member to create Hangout sessions.
You don’t have to be a member to go to Meetings, but you have to be a member to schedule Meetings.
You have to be a member to make and receive Calls.
Click ![]() or choose menu option “Kasa > Join” to
activate Membership window.
or choose menu option “Kasa > Join” to
activate Membership window.
There are 4 windows involved in signing up. Enter the necessary information and click the “Next” button to continue.
Your information is encrypted and sent to Kasanoma.
Subsequently, you will receive an account number which you may use to add yourself to KasaBook for Calls.
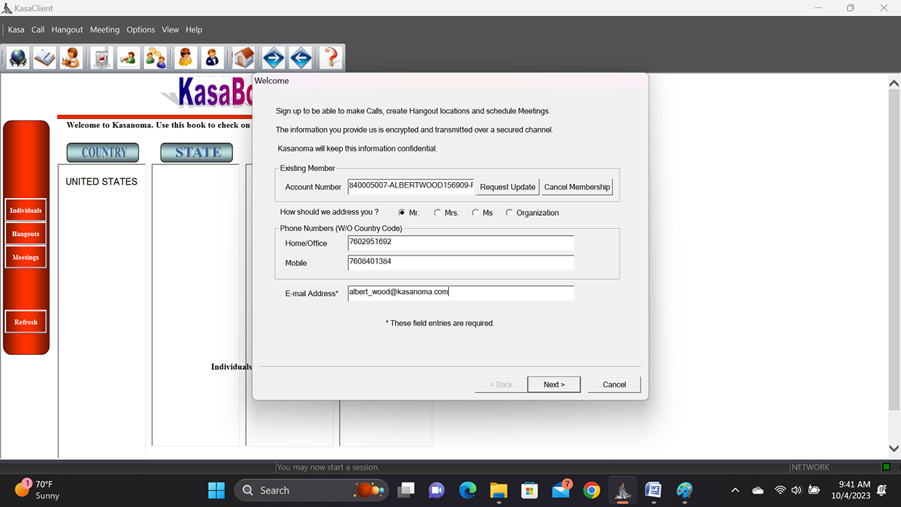
Join Window
KasaBook and You
This is your window to the world of Kasanoma. It tells you who are on-line, what Hangout sessions are opened that you can join, and what Meetings are in progress. Private Hangout sessions and Meetings require access codes, public Hangout sessions and Meetings don’t. If you want your friends to be able to call you add your name to KasaBook; otherwise you get your privacy.
v Click “Individuals” button to view people on line.
v Click “Groups” button to view active Hangout sessions and Meetings.
v From your choice of country, you go to the state (if any), and to the city.

Calling a Friend
v Start KasaClient application.
v Add your name/alias to KasaBook.
v If you want to be sure, take a look inside KasaBook to see if your friend is on-line.
v If helper window is displayed, press “Call a friend I saw in KasaBook” button.
v
Otherwise click ![]() or choose menu option “Call
> Make” to activate Call window.
or choose menu option “Call
> Make” to activate Call window.
v Choose how you want to communicate (Audio, Video or Text).
v Add or choose the registered name/alias of the associate you want to talk to.
v Click “Call” button to begin.
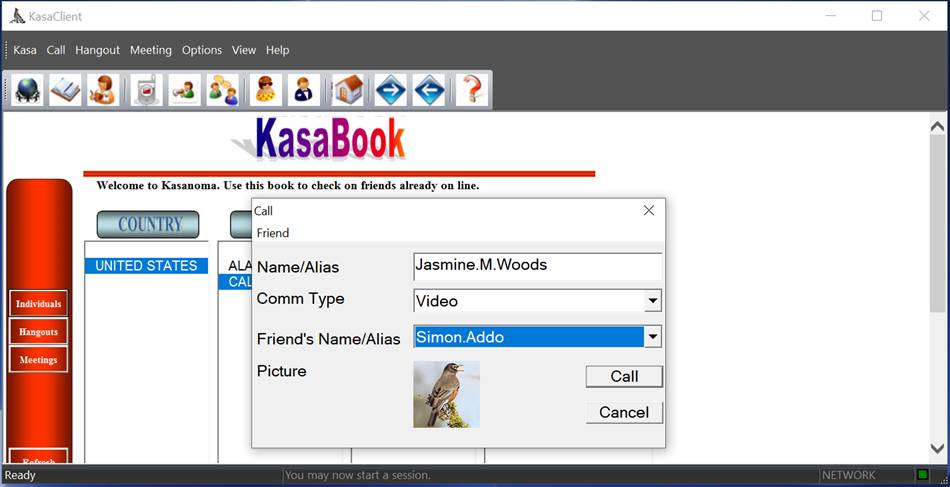
Call Window
Receiving Calls
v Start KasaClient App.
v Become a member of Kasanoma.
v Add you name to KasaBook, and voila.
v You will hear your custom ring-tone when your friends call you.
v Chose to accept or decline the Call.
Creating Hangout Session
v Become a member of Kasanoma.
v
Click ![]() or choose menu option
“Hangout > New” to activate Register Hangout Session window.
or choose menu option
“Hangout > New” to activate Register Hangout Session window.
v Enter your membership account number.
v Give the Hangout session a name.
v Choose how you want to communicate.
v Assign an access code that only your friends will know.
v Decide on how long you want the Hangout session to be available.
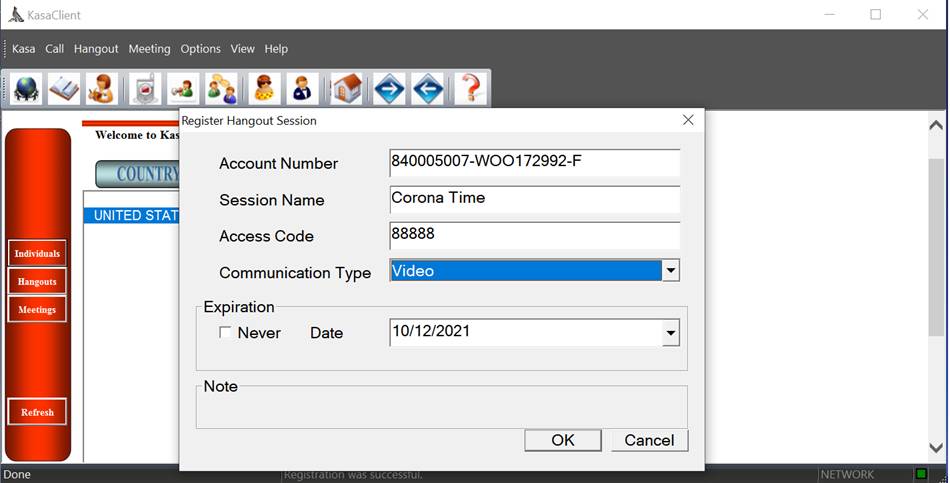
Register Hangout Session Window
v After creating the Hangout room a window will pop up to give you the opportunity to invite your friends (via e-mail) to participate in sessions. See the section on “Inviting Friends”.
Removing Hangout Session
Hangout sessions persist until their expiration date, but you can remove them earlier if you don’t need them.
v Ensure that you own the Hangout session.
v
Choose menu option ![]() “Hangout >
Remove” to activate Deregister Hangout Session window.
“Hangout >
Remove” to activate Deregister Hangout Session window.
v Enter your account number, if it is not already displayed.
v Select the session, and click “OK” button.
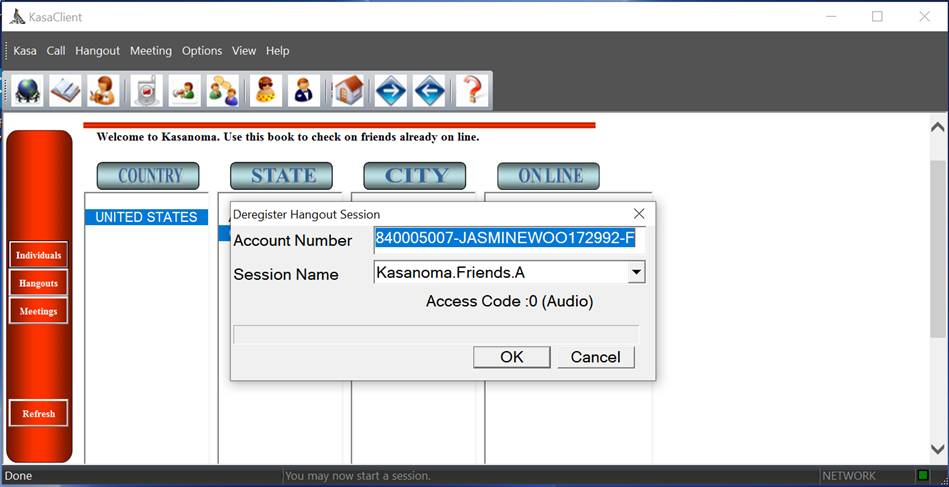
Deregister Hangout Session Window
Joining Hangout Session
v Verify that you have the audio and/or video interface devices required for the Hangout.
v If helper window is displayed, press “Join an active Hangout” button.
v
Otherwise, click ![]() or choose menu option
“Hangout > Go” to activate Hangout window.
or choose menu option
“Hangout > Go” to activate Hangout window.
v Enter your preferred name/alias.
v Add or choose the name of the Hangout session.
v Enter the session access code. If this is a public session enter zero.
v Click “Start” button to proceed.
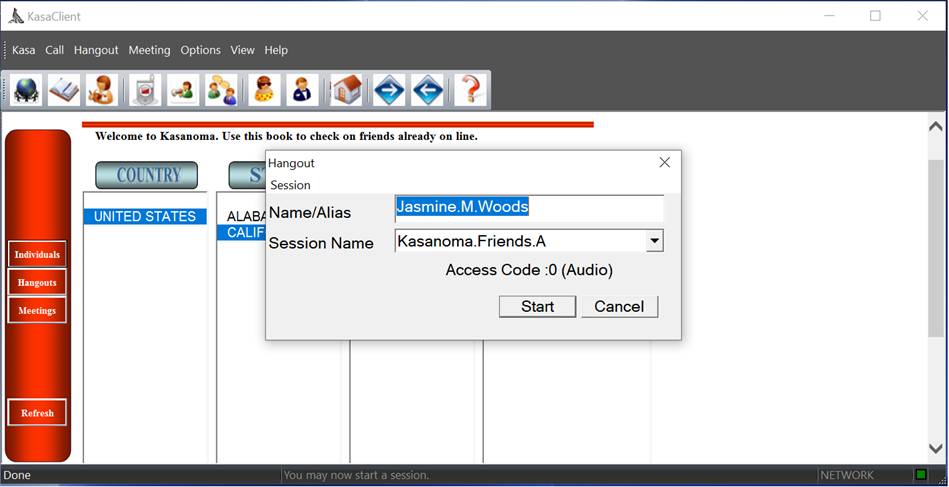
Hangout Window
Inviting Friends
People can join public Hangout sessions whenever they want to, but if you create a private Hangout session you may have to invite your friends and give them the access code. We have a tool for that.
v Go to your e-mail application and export your mailing list as VCF or CSV files.
v
Choose menu option ![]() “Hangout
> Invitations” to activate the window.
“Hangout
> Invitations” to activate the window.
v Import your mailing list. If you don’t have a mailing list, click “New Contact” to create one.
v From the mailing list (to your left), select the friends you want to invite and add them to the recipients list (to your right).
v Enter any special instructions you want to add to the invitation slip.
v Click “OK” to complete.
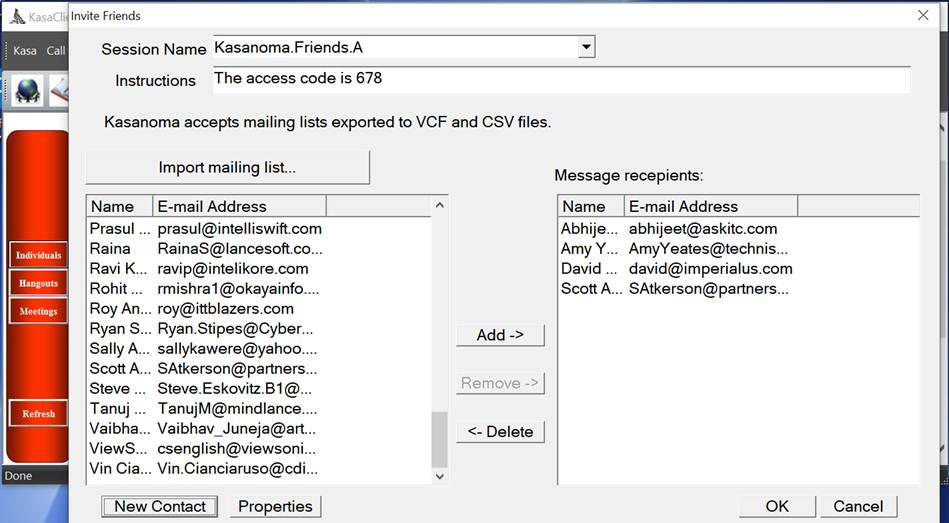
Invite Friends Window
Creating Meeting Session
v Become a member of Kasanoma.
v
Click ![]() or choose menu option
“Meeting > New” to activate Register Meeting Session window.
or choose menu option
“Meeting > New” to activate Register Meeting Session window.
v Enter your membership account number.
v Give the Meeting session a name.
v Assign an access code that only the attendees will know.
v Choose how you will communicate.
v Decide on how long you want the Meeting session to be available.
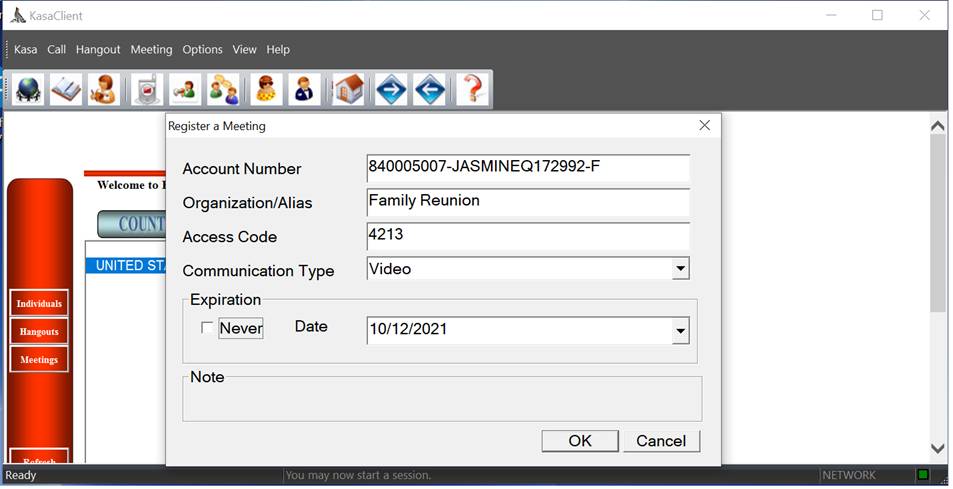
Register Meeting Window
v After creating the Meeting a window will pop up to give you the opportunity to invite participants via e-mail. See the section on “Scheduling a Meeting”. On the day of the Meeting participants will receive a reminder. The reminder will repeat a few minutes before the Meeting.
Removing Meeting Session
Meeting sessions persist until their expiration date, but you can remove them earlier if you don’t need them.
v Ensure that you own the Meeting session.
v
Choose menu option ![]() “Meeting >
Remove” to activate Deregister Meeting Session window.
“Meeting >
Remove” to activate Deregister Meeting Session window.
v Enter your account number, if it is not already displayed.
v Select the session, and “OK”.
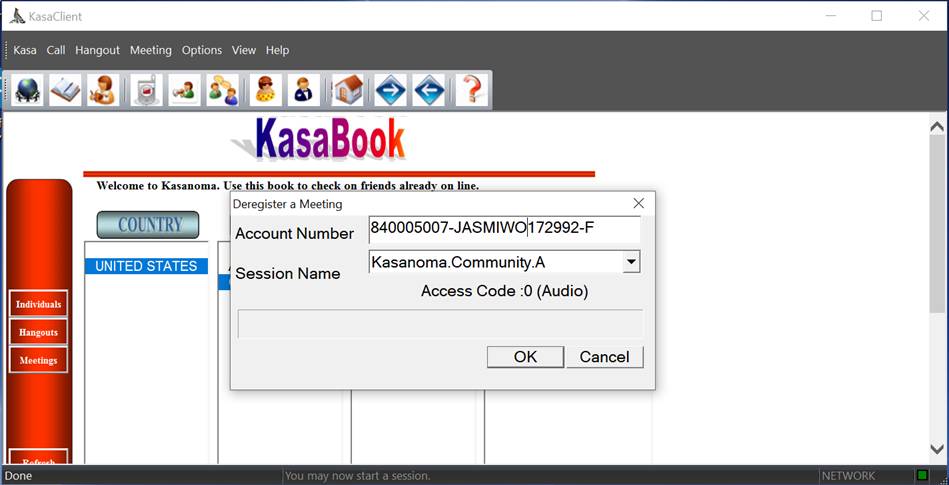
Deregister Meeting Window
Scheduling Meeting
Anybody can participate in public Meetings, but if you create a private Meeting session you may have to invite the appropriate participants and provide the access code.
v Go to your e-mail application and export your mailing list as VCF or CSV files.
v
Choose menu option ![]() “Meeting > Schedule”
to activate the window.
“Meeting > Schedule”
to activate the window.
v Import your mailing list. If you don’t have a mailing list, click “New Contact” to create one.
v From the mailing list (to your left), select the Meeting participants and add them to the list (to your right).
v Enter any special instructions you want added to the invitation slip.
v Click “OK” to complete.
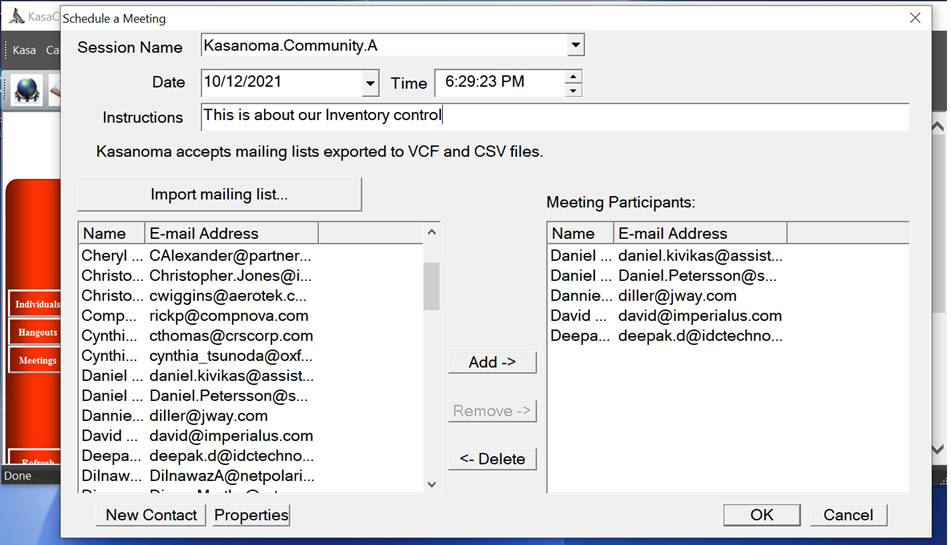
Schedule Meeting Window
Going to Meeting
v Verify that you have the audio and/or video interface devices required for the Meeting.
v
If helper window is displayed, press “Join an active Meeting”
button, otherwise click ![]() or choose menu option “Meeting > Go”
to activate Open Meeting Session window.
or choose menu option “Meeting > Go”
to activate Open Meeting Session window.
v Enter your preferred name/alias.
v Add or choose the name of the Meeting session.
v Enter the session access code. If this is a public session enter zero.
v Click “Start” button to proceed.
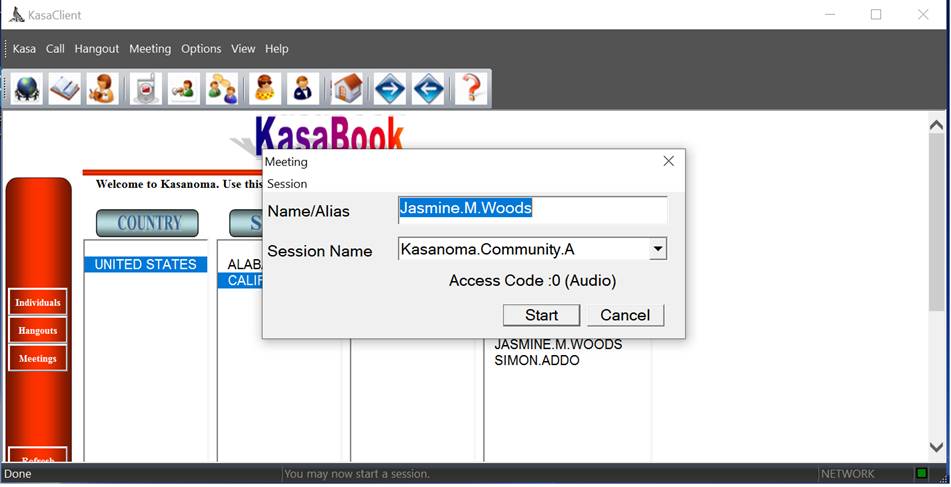
Meeting Window
Recording Conversations
v Start a session.
v If you chose to “Automatically Record Conversations” from the “Settings” window then assume the conversation is being recorded.
v Choose menu option “Kasa > Record” to begin recording.
v Every member of the communications will be separately recorded,
v You may stop recording at any time by choosing menu option “Kasa > Stop Recording”.
v The recording is saved in App’s recording folder..
Playing Back Conversations
v This service is not currently available.
Photo Shoot
This could be fun. During video sessions (or video testing) you can actually take a picture of yourself or your friend. On you next Audio conversation the pictures automatically displays.
v Choose menu option “Kasa > Photo”.
v Ask your friend to say “Cheese”.
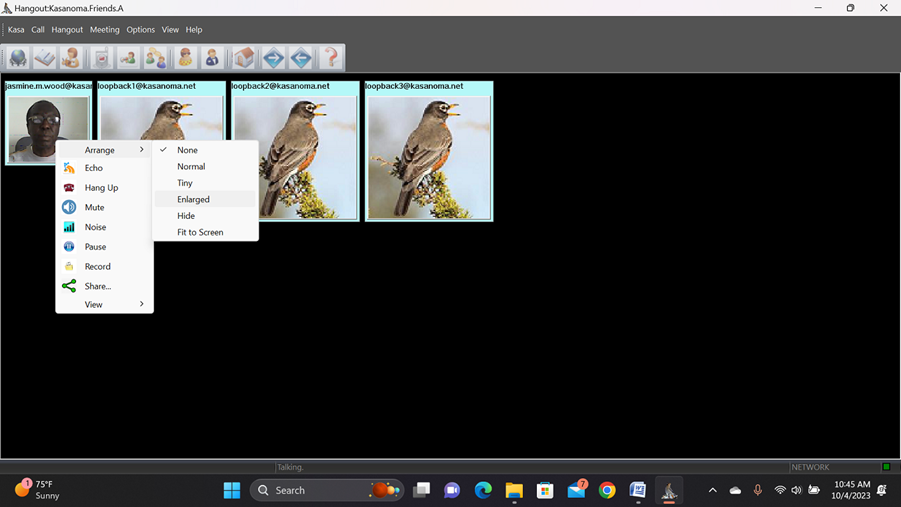
Resizing Communication Windows
You may change the sizes of communication windows (you or your colleagues) in several ways:
v Press the title bar to enlarge the specific window.
v Long-press the title bar to shrink the window.
v Right-click your picture (or video) window and select menu option “Arrange” and choose a method to arrange and resize all the communication windows at the same time.